Table of Contents
Introduction
Imagine having a silent witness on every journey you take—a device that quietly records your drives, offering security, accountability, and peace of mind. Installing a dash cam has rapidly become a must-have for drivers who value safety and want reliable evidence in case of accidents or disputes. With the increasing complexity of today’s roadways, a dash cam not only helps protect your vehicle but also enhances your confidence behind the wheel.
Understanding why a dash cam is an essential addition to your vehicle goes beyond just recording video. More than 80% of drivers in some regions reported feeling safer knowing they had recorded proof in the event of a collision or insurance claim. Additionally, dash cams can capture unexpected moments—from near misses to helpful road incidents—that contribute to road safety awareness. Whether you commute daily, take road trips, or drive commercially, having this technology can be a vital tool in your automotive safety arsenal.
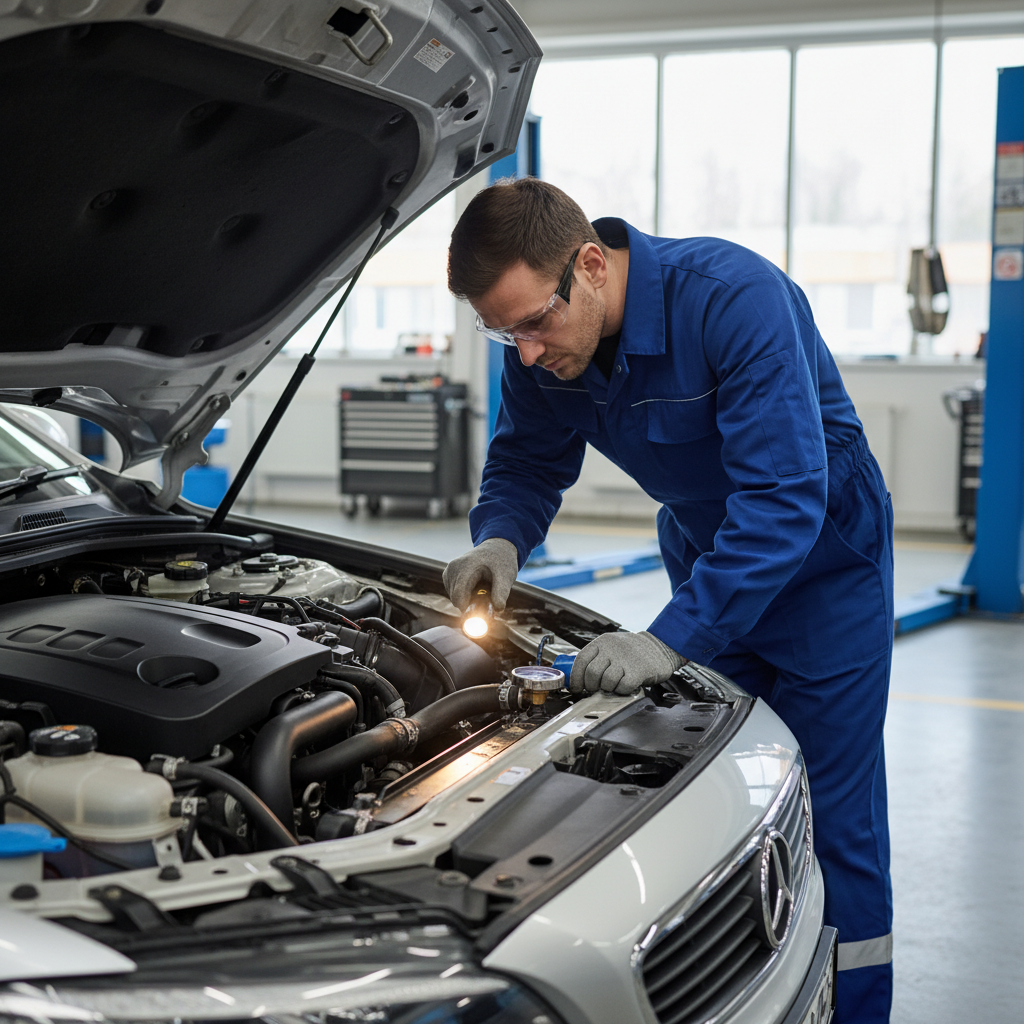
One common concern many drivers share is the installation process. Many feel overwhelmed at the thought of integrating new technology with their vehicle’s electrical system or worry about damaging their car’s interior trim. However, with the right guidance and tools, installing a dash cam is more straightforward than it appears. Learning the proper installation steps enables you to secure the camera optimally, conceal wiring neatly, and ensure your device functions reliably without draining your car battery.
Moreover, dash cams serve not only as accident evidence collectors but also as deterrents against fraudulent insurance claims and reckless behavior. They can offer timestamped footage that holds up in court or insurance reviews, supporting your case effectively. Concerns about power management and camera positioning can be addressed when you invest time to understand the best practices for installation, making the entire process rewarding and empowering.
What You’ll Learn in This Guide
In this comprehensive step-by-step guide, we will walk you through everything you need to know to install your dash cam correctly and safely. Whether you are a beginner or have some technical skills, this guide will equip you with the knowledge to complete the installation confidently. Here’s what you can expect to learn:
- Preparing Your Tools and Equipment: We’ll go over the essential tools, including the dash cam kit, power options, and handy accessories, so you have everything ready before starting the installation.
- Mounting Your Dash Cam: Learn how to choose the best position on your windshield for unobstructed views while keeping the camera discreet, and how to attach the mount securely.
- Wiring and Power Connection: Discover methods to route cables neatly and connect your dash cam to your vehicle’s power supply, including tips on fuse taps and cigarette lighter adapters for efficient power management.
- Testing and Final Adjustments: Understand how to position the camera accurately, check operation thoroughly, and troubleshoot common installation issues to ensure your dash cam works perfectly from day one.
The detailed instructions in this article will help you avoid common pitfalls and offer insights on how to maintain your dash cam for long-term reliability and effectiveness. By following this guide, you’ll gain not only installation skills but also practical knowledge to maximize your dash cam’s utility and lifespan.
As you journey through the guide, you’ll find easy-to-follow steps that cover each phase of installation clearly and systematically. We’ll start with identifying all the materials and tools you need, then move into the physical mounting process, followed by wiring and powering the device. Finally, we will cover testing techniques to confirm everything functions smoothly under real driving conditions.
Additionally, we’ll touch on common issues you might encounter during installation and provide troubleshooting advice to help you fix them without frustration. You’ll also learn maintenance tips for cleaning and updating your dash cam to keep it performing optimally over time.
By the end of this guide, you will be equipped to handle your dash cam installation with confidence and precision, adding a valuable safety feature to your vehicle. Let’s begin this journey towards smarter driving and enhanced security on the road.
Installing a dash cam in your vehicle is a practical investment that enhances both safety and security on the road. With the rise in accidents and disputes, having a reliable dash cam can provide vital evidence to prove your case or prevent fraudulent claims. Installing a dash cam yourself can be a satisfying and cost-effective task, ensuring you place the device optimally for recording and maintaining a clean setup that doesn’t interfere with driving visibility. In this discussion, we will explore the crucial steps involved in installing your dash cam correctly, from preparation to troubleshooting common issues, so you can confidently enhance your driving experience.
Essential Preparations Before Installing Your Dash Cam
Before diving into the installation process, it is important to gather all the necessary tools and equipment to ensure a smooth and efficient setup. Having your dash cam device paired with a suitable mounting kit is the first priority, as the mount determines where and how securely your camera attaches to the windshield. Power cables need consideration too, and these may come with fuse taps or cigarette lighter adapters depending on whether you prefer a hardwired or plug-in power setup. To aid a professional finish, include a trim removal tool and screwdriver to help tuck wiring neatly behind panels, along with adhesive pads for mounting.
Choosing the right dash cam also influences your installation experience and final functionality. Key factors include resolution quality—higher resolutions capture clearer details—alongside storage capacity, which affects how much footage you can record before overwriting. Features such as night vision, GPS tracking, and loop recording are additional considerations that may affect where and how the dash cam is installed, due to requirements like unobstructed views or power needs. To fully grasp these preparatory decisions and select the perfect device, it helps to research foundational knowledge about dash cam options and accessories.
Key Aspects of Preparing for Installation
Preparation involves multiple components that ensure your installation goes without a hitch. Here is a breakdown of the critical factors to consider:
- Device and Mount Compatibility: Ensure your dash cam model is compatible with the provided mount and that the mounting location in your vehicle’s windshield is suitable for secure attachment. This prevents the camera from loosening or falling during drives.
- Power Supply Options: Decide between using a hardwire kit connected to the fuse box or a more straightforward cigarette lighter adapter. Hardwiring offers a cleaner look and continuous power but requires more skill during installation.
- Tools Readiness: Having trim removal tools, screwdrivers, and adhesive pads on hand prepares you for managing interior panels and securing cables out of sight, enhancing safety and aesthetics.
- Feature Impact on Placement: Features like GPS or wide-angle lenses impact your positioning as they require clear access to satellites or an unobstructed field of view, affecting your installation choices.
Step-by-Step Dash Cam Installation and Troubleshooting
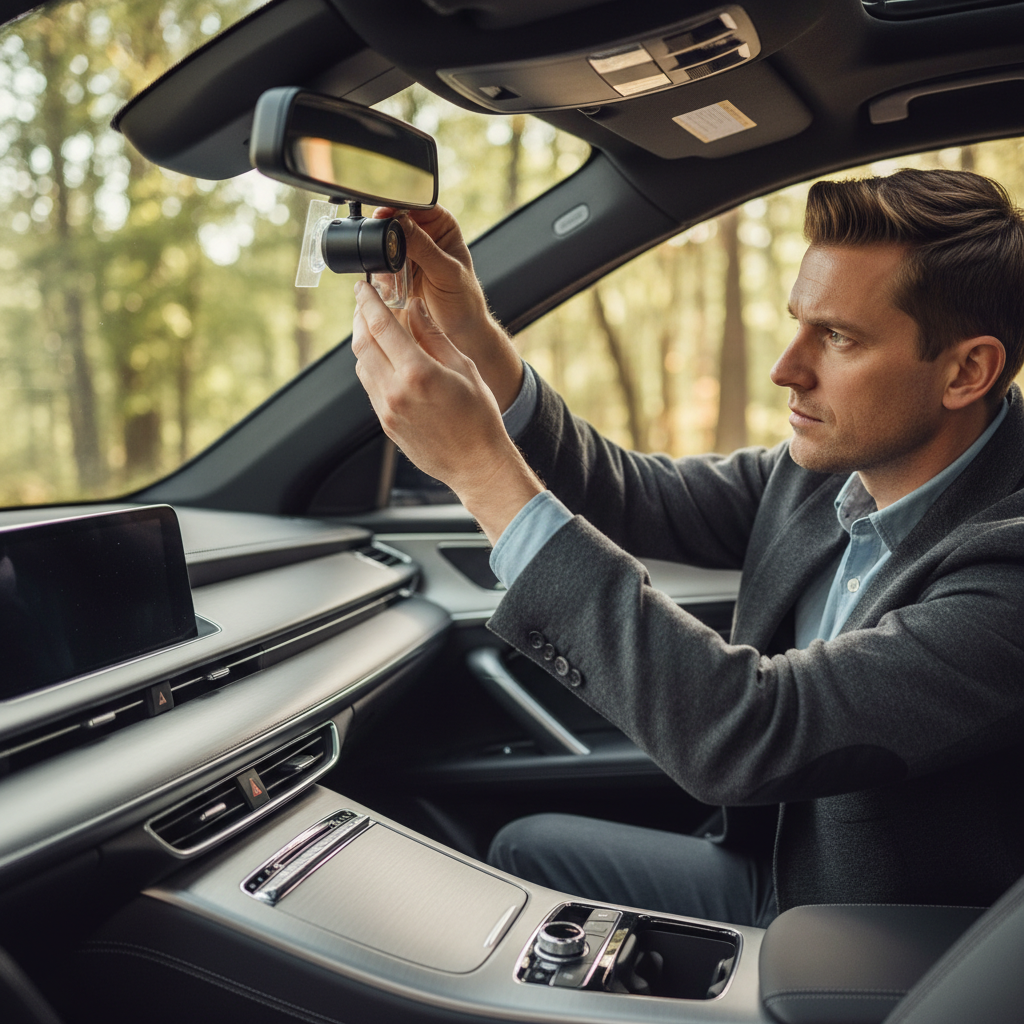
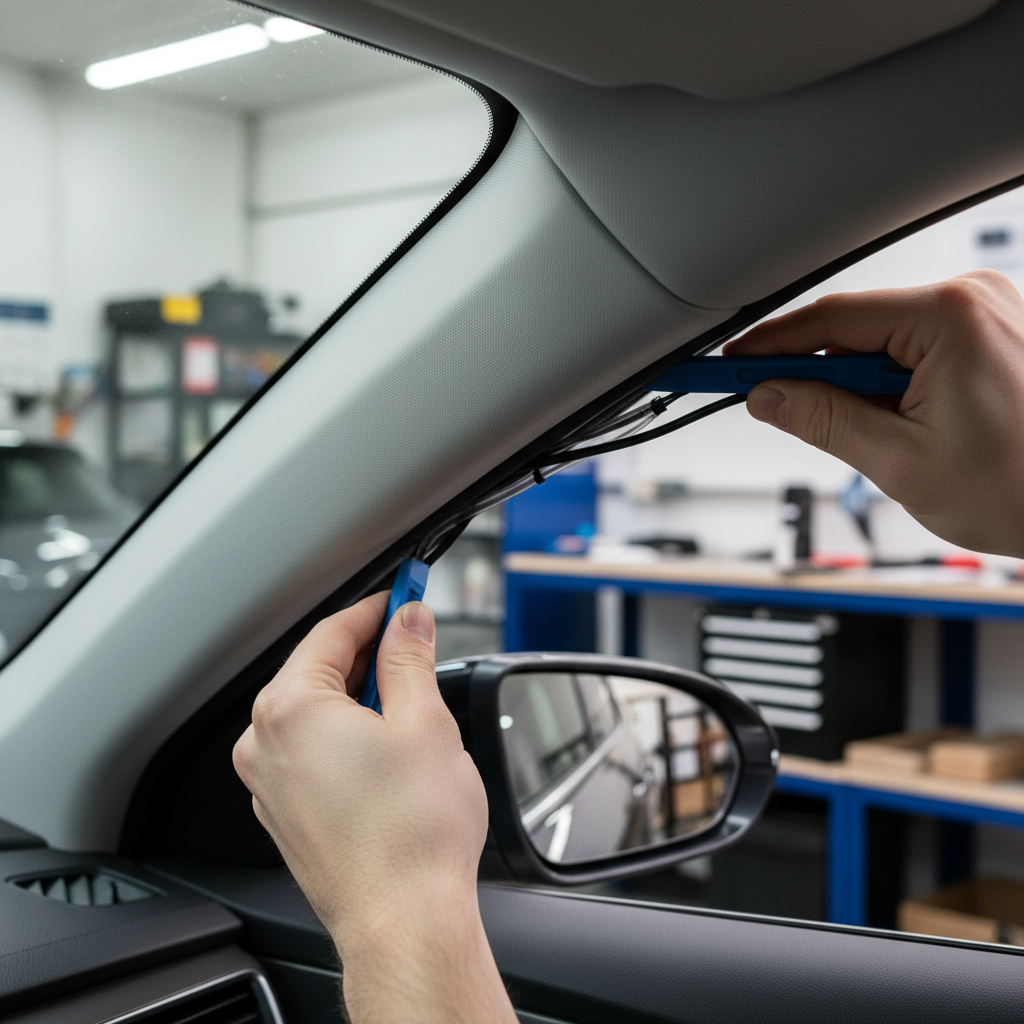
Once you have gathered all essentials and selected the right dash cam, the installation process becomes straightforward. Start by identifying the optimal mounting spot, usually behind the rearview mirror, where the camera can record forward without interfering with the driver’s field of vision. Secure the mount firmly using adhesive pads or suction mechanisms and then attach the dash cam to this mount. Subsequently, neatly route the power cable along the headliner and down the A-pillar, using the trim removal tool to tuck cables behind panels without damage.
Connecting power correctly is vital — whether you use the fuse box with a fuse tap for a hidden hardwire installation or plug into the cigarette lighter adapter for an easier setup. After connections are made, finalize your installation by adjusting the camera angle to capture the road properly. Turn on the dash cam and verify it is recording effectively by checking the display or indicators. If you encounter any issues such as the dash cam failing to power on or the mount loosening, troubleshooting steps can resolve these common problems quickly, ensuring longevity and performance.
Important Considerations for Installation and Troubleshooting
To ensure your dash cam installation is both secure and functional, keep these considerations in mind:
- Optimal Mount Location: Placing the dash cam behind the rearview mirror maximizes recording coverage without distracting the driver. This spot balances visibility and compliance with road safety regulations.
- Neat Cable Management: Running cables along the headliner and A-pillar keeps wires hidden and prevents interference with airbags or vehicle controls. Use trim removal tools carefully to avoid interior damage while tucking cables away.
- Power Connection Choices: Hardwiring into the fuse box can prevent battery drainage through features like low-voltage cutoffs, while cigarette lighter adapters offer plug-and-play ease but may drain the battery if left connected.
- Troubleshooting Power Issues: If the dash cam won’t power on or shuts off unexpectedly, check fuse taps for proper installation and ensure the power source is functioning. Loose mounts causing the camera to fall often require stronger adhesive pads or readjusting the mounting angle.

Conclusion
Installing a dash cam is a practical and empowering upgrade that enhances both your vehicle’s security and your peace of mind on the road. Throughout this guide, we’ve covered the essential steps to equip your vehicle with this valuable safety device. From preparing the proper tools and selecting an optimal mounting location to neatly routing power cables and verifying recording functionality, the process has been broken down into manageable steps that even beginners can accomplish confidently. This hands-on approach not only protects you against accidents and fraudulent claims but also helps capture important driving events that could prove critical in unforeseen situations.
Key takeaways include the importance of choosing the right dash cam with essential features like good resolution and storage capacity, ensuring secure attachment to avoid camera dislodgement, and carefully managing wiring to maintain your vehicle’s aesthetic and electrical safety. We also discussed troubleshooting common installation challenges such as power failures and mounting issues, as well as maintenance practices like regular lens cleaning and software updates to keep your device working reliably in the long term. These insights highlight how a well-installed dash cam can be a seamless part of your driving experience, offering continuous protection without inconvenience.
Remember, the installation process is not just about setting up hardware, but about creating a dependable safety tool tailored to your driving needs. With proper attention to detail and adherence to the steps outlined, you can confidently complete the setup yourself, saving installation costs and gaining a deeper understanding of your dash cam’s operation.
To move forward, start by gathering all the necessary equipment—your dash cam kit, power cable options, and mounting tools. Carefully plan the placement behind the rearview mirror to ensure clear visibility and discreetness. Follow the wiring instructions methodically, whether you opt for a fuse tap or cigarette lighter adapter, ensuring the cables are hidden and secured. After installation, test the camera thoroughly by adjusting angles and confirming continuous recording during different driving conditions. If you encounter difficulties, troubleshooting tips covered earlier can help resolve issues efficiently.
For more detailed guidance on vehicle electronics and safe wiring practices, consider exploring specialized automotive resources or seeking professional advice if necessary. Taking these actionable steps will result in a clean, effective installation that enhances your driving safety seamlessly while preserving your car’s interior integrity.
In closing, installing a dash cam is a highly rewarding DIY project that adds substantial value to your vehicle. Embrace the knowledge gained here to take control of your automotive safety with confidence and precision. Your investment in this technology not only safeguards you on the road but also offers ongoing peace of mind with recorded evidence whenever you need it. For further learning, we encourage you to explore additional guides on automotive maintenance and vehicle safety to continue enhancing your driving experience.